Typically, we utilise the full spectrum of visible light (white light) when we image or photograph the eye in practice. However, the use of selected and specific wavebands for illumination and viewing can open up many more possibilities. This is analogous to using monochromatic green and red in the duochrome test used in a subjective sight test. This would produce a much more definitive end point than if the whole spread of the visible spectrum of white light was utilised.
Influence of wavelength
In retinal photography, longer wavelengths are focused deeper in the retina than shorter wavelengths, with red focused at the level of the inner choroid and RPE, green in the mid to inner retinal layers and blue in the inner retina at the retinal nerve fibre layer level (figure 1).
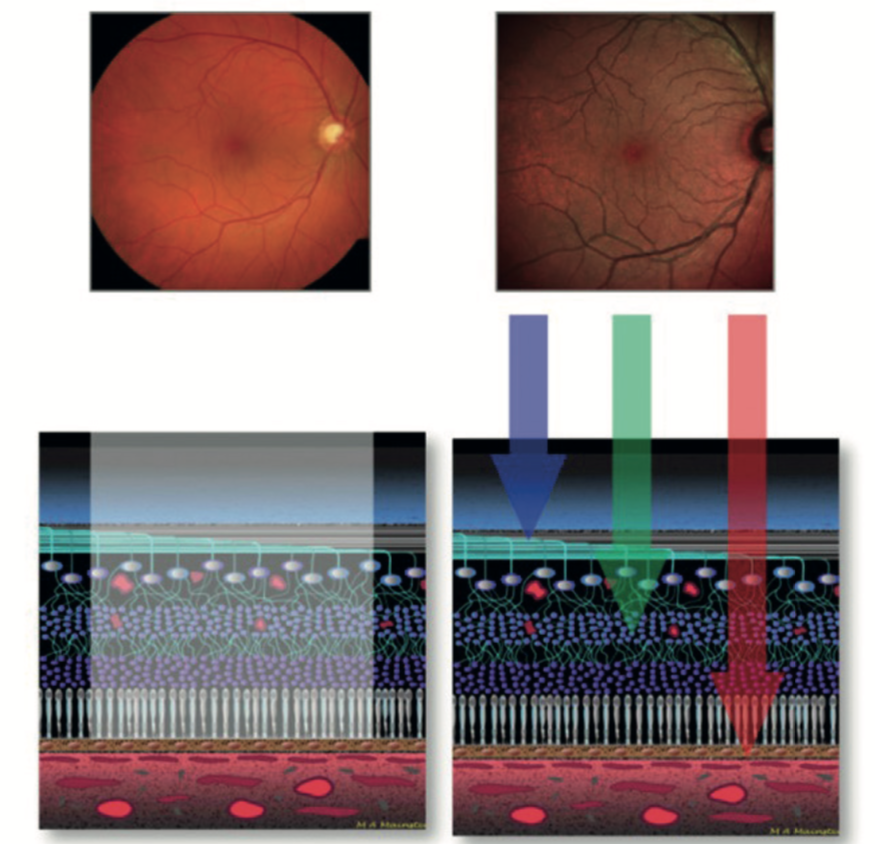
Figure 1: White light multiple wavelength imaging (left) offers less resolution than combined confocal colour channels (right)
This can be used to great effect when, for example, trying to assess the depth of a pigmented choroidal lesion such as a naevus. A choroidal lesion would be seen clearly with the longer wavelength infra-red channel, less so with the full colour photo.
Figure 2 shows a choroidal naevus seen with full colour (red/green/blue) channel imaging but not when the green channel is isolated. This shows the lesion to be specific to the deeper, choroidal level. If the choroidal lesion was much thicker, such as a growing choroidal melanoma, its presence in the green channel image might indicate anterior extension and encroachment of the lesion.

Figure 2: A choroidal naevus is clearly seen with the RGB image (a), but its absence in the green channel image (b) confirms its choroidal location
If the pigmented lesion is at the retinal level, such as with a retinal pigment hypertrophy or hypoplasia, then its would be seen with both the full colour and the green channel, though less so or not at all with the red or infra-red channels (figure 3). An OCT scan could confirm these findings, as long as the lesion was not too peripheral to perform a sectional scan.

Figure 3: Pigmented lesions seen in both the full colour channel (top) and the green channel (bottom) may be located at a retinal level. In this case, the lesion is a small retinal pigment epithelium hypertrophy
Wedge retinal nerve fibre defects can also be more appreciated if the illumination is restricted to the blue or green wavebands which focus at the level of the inner retina (figure 4). Once again, an OCT with RNFL analysis will often do this better, but practices without an OCT can use monochromatic photography to great effect.

Figure 4: Retinal nerve fibre defects imaged using blue/green wavelength photography
The depth to which light penetrates tissue, and the intensity of its impact is a function of the wavelength and its reciprocal frequency. A good example to illustrate this is the way different lasers affect ocular tissues. A short wavelength, high frequency laser, such as the YAG, will not penetrate into the eye very far but will induce a high energy impact at the point of focus. This is exploited in, for example, capsulotomy procedures. Longer wavelength, lower frequency laser are better used for retinal treatment as they penetrate the eye to a greater depth, but have a less focused and intense impact at the point of focus.
When using light for treatment purposes, such as the recently introduced IPL therapy for lid disease, the incident wavelength changes the tissue depth at which the impact is focused (figure 5).

Figure 5: The depth of impact of intense pulsed light (IPL) therapy is a function of the wavelength of the incident light
Infra-red
Infra-red (IR) imaging is used in ‘night-vision’ viewing scopes and cameras that are sensitive to near IR (700-1000nm), and are regularly used by the armed forces, the police and nature photographers. Longer wavelength IR (far IR) photography is used when heat information about a source is required. This is called thermography and the images obtained are called thermograms. They are used in many fields such as medicine, firefighting and assessing the thermal efficiency of buildings (figure 6).

Figure 6: Retinal nerve fibre defects imaged using blue/green wavelength photography
This technique can be used in optometry, for example in looking at the heat impact of a meibomian gland heat treatment (figure 7).

Figure 7: Use of a thermography app (top) to view a patient after meibomian gland heat therapy (bottom)
Infra-red (IR) cameras are used frequently as alignment and focusing devices for other imaging modalities such as fundus cameras and OCT scanners. This is because the pupil does not constrict when IR light is used. This enables a much wider and better lit view of the retina so that alignment of the more brightly illuminated high resolution colour camera system can occur through the relatively dilated pupil. IR cameras are also used to measure mesopic and scotopic pupil sizes in pupilometer technology involved in contact lens fitting and refractive surgery assessment. The IR used in eye care imaging is usually the near IR, the part of the spectrum just beyond the red end of the visible spectrum.
Fluorescence
Shorter wavelength visible light may be used in imaging fluorescent retinal or disc lesions. If only the blue signal is utilised in disc photography, calcified disc drusen can be shown to fluoresce (figure 8).

Figure 8: Blue light imaging reveals fluorescing disc drusen
When undertaking fundus autofluorescence (FAF) imaging, the retina is illuminated with shorter wavelength blue/green light and a barrier filter is employed to only receive the longer orange-red wavelengths emitted from any fluorescing material. This longer waveband is specific to the emission spectra of, for example, lipofuscin which accumulates in old and damaged retinal pigment epithelial cells. This means it is possible to detect early changes due to age-related macular degeneration, Stargardts disease and other retinal degenerative conditions (figure 9).
Figure 9: Fundus autofluorescence in Stargardt’s disease
In figure 10, the bright white changes indicate areas of diseased retina and the darker, while black areas indicate retinal death.
Figure 10: Fundus autofluorescence in age-related macular degeneration
This can be compared to the normal autofluorescence image of a healthy 40-year-old (figure 11). The optic disc appears dark in FAF because of the absence of lipofuscin and the blood vessels appear dark because they mask the retinal FAF signal below them.
Figure 11: Fundus autofluorescence image of a normal retina
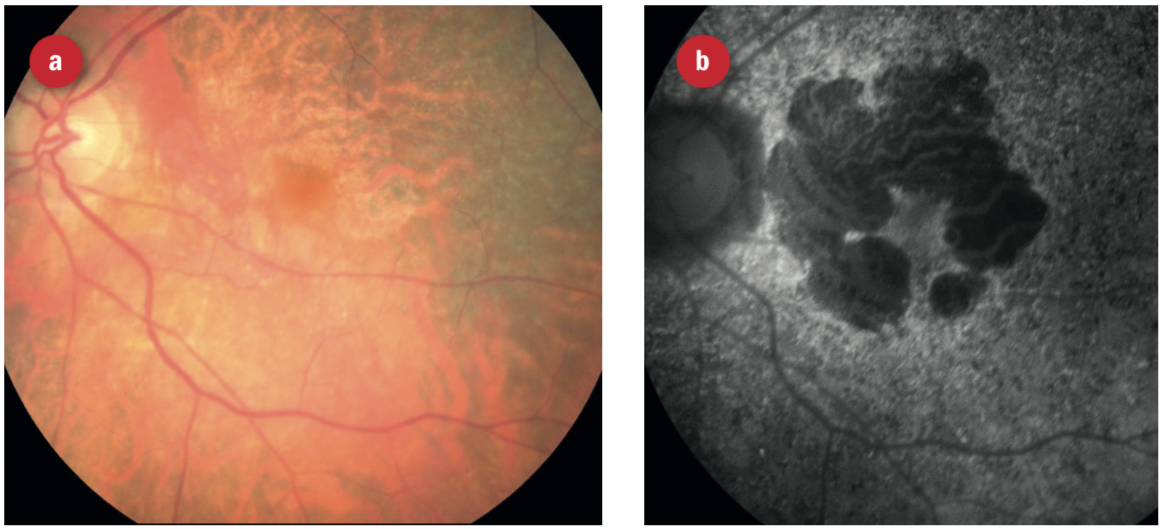
Figure 12: What appears to be a healthy colour image of an elderly patient’s retina. However, on FAF, the full extent of retinal disease is easily seen
Anterior imaging with stains and dyes
Anterior imaging can be aided by the use of dyes and stains.
Fluorescein
At an initial dry eye assessment, I take images of all the structures affected in dry eye disease and again after a period of treatment. A picture is worth a thousand words. This photographic approach makes for better patient understanding of the situation and of the treatment plan required, so encouraging better compliance.
We can use fluorescein stain to assess the tear break-up time (figure 13), the presence of corneal desiccation staining (figure 14), or corneal irregularity (figure 15). Visualisation is enhanced if a cobalt blue light source is used to excite the stain and a Wratten 12 yellow barrier filter is employed to enhance the appreciation of the green hue from the tear film and corneal staining (figure 16).

Figure 13: Fluorescein tear break up

Figure 14: Corneal desiccation stain
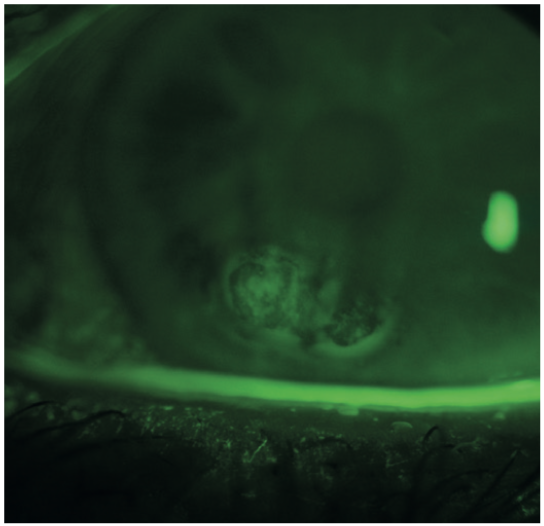
Figure 15: Fluorescein highlighting corneal surface irregularity
Other uses include the assessment of a rigid gas permeable contact lens fit (figure 16), diagnosis of corneal disease (figure 17), and assessment of extent of a disease or lesion (figure 18).
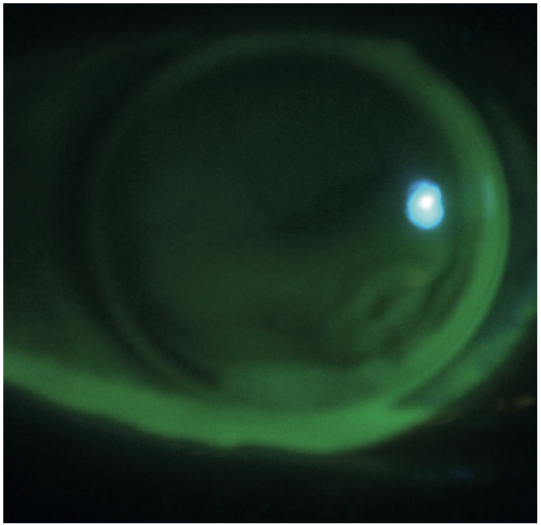
Figure 16: Assessment of rigid gas permeable contact lens fit

Figure 17: Fluorescein used to demonstrate epithelial basement membrane or map dot fingerprint dystrophy
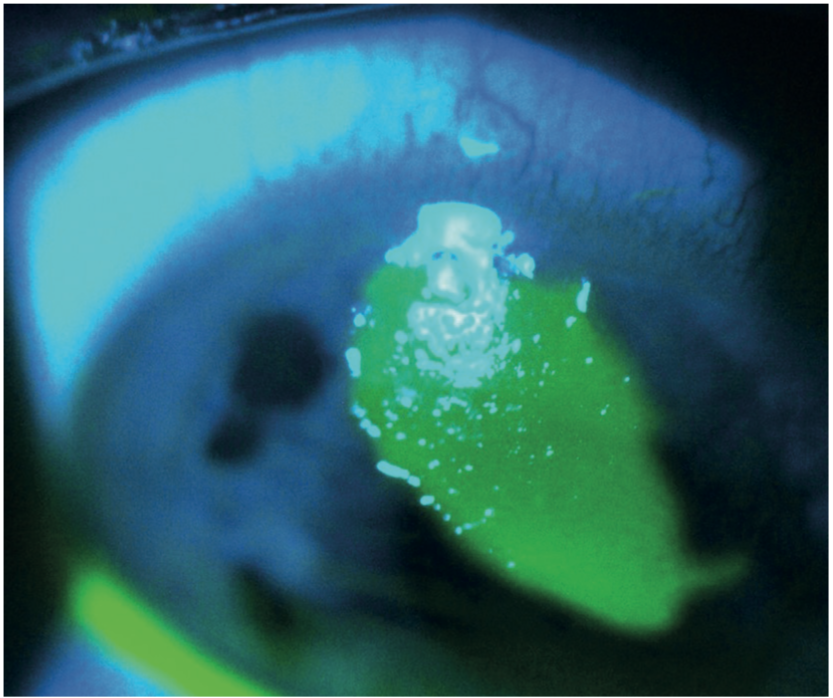
Figure 18: Fluorescein shows the extent of a corneal erosion
Lissamine green
Lissamine green staining of the conjunctiva is very useful in dry eye assessment as it gives us an indication of conjunctival goblet cell health. Impression cytology gives a more accurate direct measurement, but is not practical in a normal clinical setting. Unfortunately, when viewed in full colour, the light green lissamine staining is often faint and shortlived (figure 19), but it can be enhanced by the use of a red barrier filter, a Wratten 25.
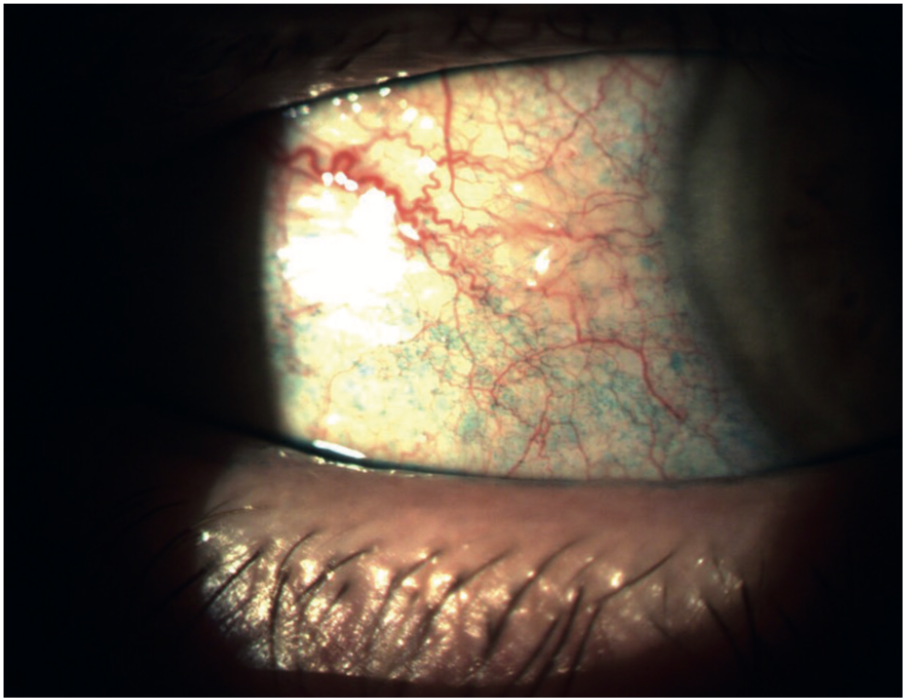
Figure 19: Lissamine green staining of the conjunctiva indicates goblet cell compromise

Figure 20: Yellow absorption filter for fluorescein view enhancement, and red (Wratten 25) filter to assist viewing of lissamine green stain
If a monochromatic green free image can we captured on the slit lamp (figure 21), the appearance of the lissamine green staining becomes much better defined still. Lissamine green staining fades relatively quickly so should be assessed one eye at a time to prevent it being under-reported in the second eye observed. 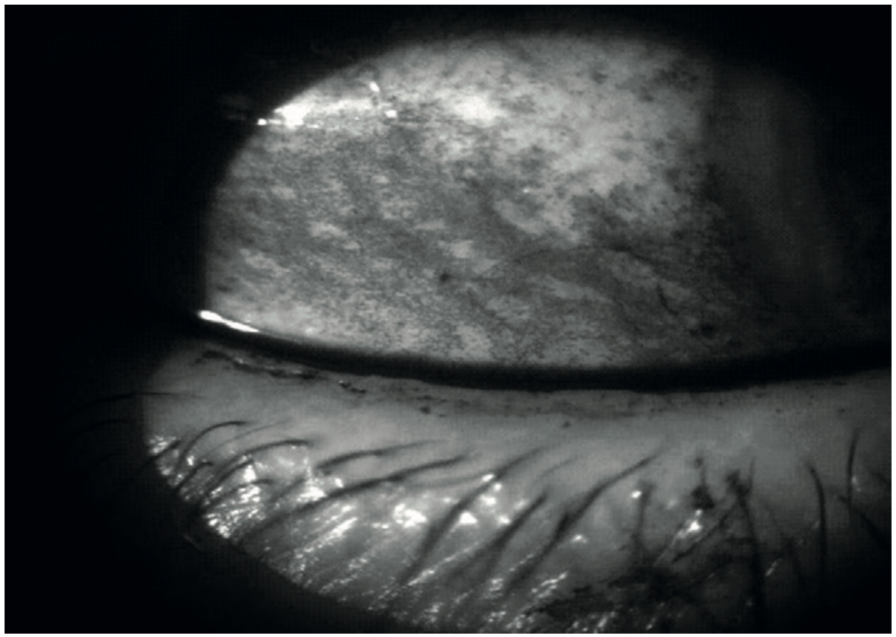
Figure 21: Green free image shows lissamine green stain in improved contrast
Meibography
Relatively recently, IR imaging has been used to improve visualisation of the meibomian glands in the eyelids (termed meibography) as part of dry eye assessment and monitoring. It can show such things as gland drop out and shortening of the glands in meibomian gland dysfunction which can lead to evaporative dry eye. This is important, as 86% of dry eye patients are affected by MGD/evaporative dry eye.1 Meibography enables us to visualise the meibomian glands more clearly, objectively record their status and improvement with appropriate treatment.
This improved visualisation is demonstrated by first the full spectrum image and then the IR meibography image of the lower lid of the same eye in figure 22. Figure 23 shows the appearance of an eye with normal meibomian glands.

Figure 22: Appearance of the meibomian glands using (a) white light and (b) infra-red light. Note the drop out of some glandular material
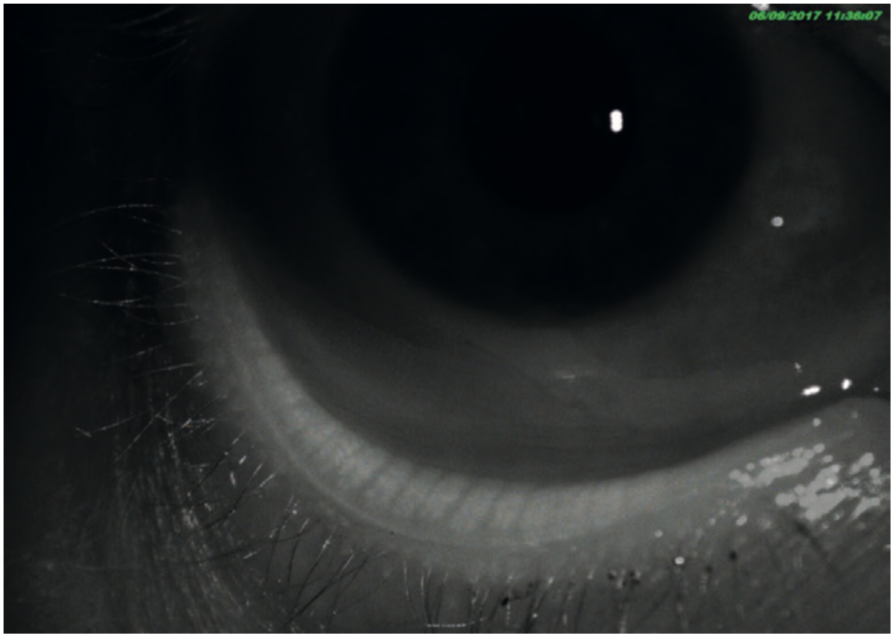
Figure 23: Meibography of a healthy eye with full meibomian function
In our practice we use the ARC IR Imaging/Meibography attachment on our slit lamp which is part of an imaging software suite. Meibography can also be performed with other equipment that utilises IR photography, such as certain topographers (for example the Oculus and the Visionix), the Lipiview system, the IDRA system, and standalone meibographers which are often linked to tablet devices (such as the one from Topcon). Integrated software enables the IR images to be stored in a common patient file location along with other slit lamp, fundus camera and OCT images. IR imaging shows meibomaian gland dropout, atrophy and shortening of the meibomian glands and glands with occluded orifices. Some software will help quantify the drop out.
The ability to image the meibomian orifices along with interferometry images showing the quality and characteristics of the tear lipid layer, the non-invasive tear break up time and fluorescein break-up time (which can be stored as video) can be demonstrated to the patient. Additionally, tear meniscus height can be recorded under IR illumination resulting in a more meaningful result as no reflex tears are produced. These recordings along with photos showing bulbar injection and chemosis, bulbar conjunctival staining with lissamine green, fluorescein staining of the cornea and an everted tarsal conjunctiva evaluation provide an ongoing digital history of a patient’s dry eye condition and its progress as they undergo continuing treatment. The returning patient can readily visualise the improvements made. This helps ensure better understanding and compliance.
Treatments for meibomian gland disease include hot compresses, lid wipes (such as with anti-bacterial products such as MeiboClean which also contain tea tree oil extract), antibiotics (such as azithromycin and doxycycline) and more recent additions, such as IPL and thermal meibomian gland expression (TMGE). I almost always perform TMGE after IPL, as the two treatments are complementary. Expression also indicates how many of the meibomian glands are still functioning and the quality of the secretions produced. Meibum may range from having the appearance of toothpaste, indicating a potential concern, to olive oil as the secretions improve.
Other infra-red uses
IR imaging has other uses in ophthalmology and optometry. Often a patient may come in complaining of night-time glare that is due to cortical cataracts or capsular opacification but which may be hidden from view when the eye is examined with a slit-lamp or ophthalmoscope. Due to the absence of pupil constriction when viewing the lens with an IR light source, the offending opacification can be observed clearly and used to explain the nature of the problem to the patient (figure 24). This is especially useful with patients who cannot be dilated because they have occludable anterior chamber drainage angles. Often, we find that anterior chamber angles appear occludable on OCT scanning, see image below, but more open on van Herrick assessment. Some would argue that in some cases the image from the OCT (which is taken without visible light causing pupil constriction) is very relevant, as it shows the angle as it would be in low light conditions, where angle closure is more likely.
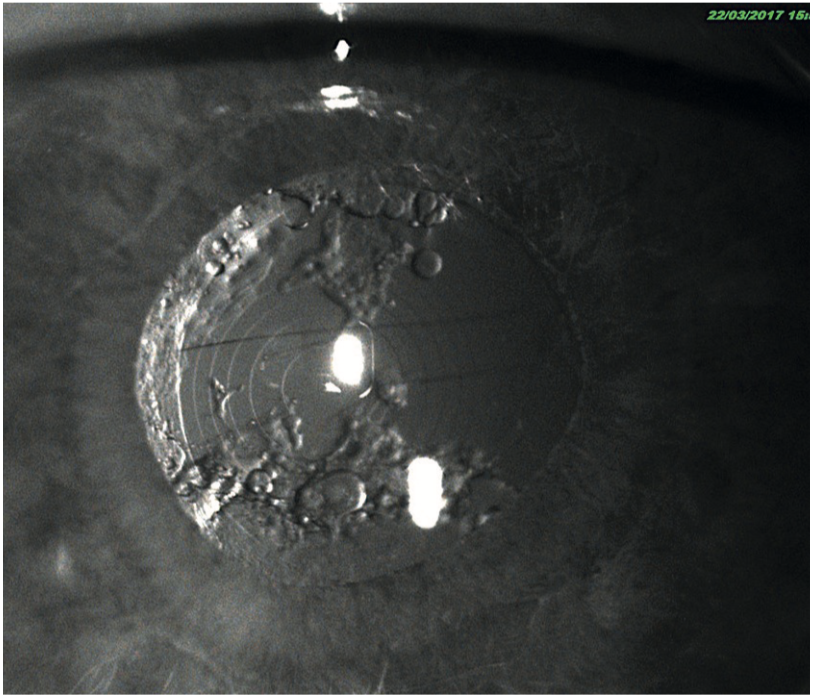
Figure 24: Infra-red imaging showing problems with a diffractive intraocular lens but without the need for dilation
We conventionally assess the fit of a contact lens using visible illumination at the slit-lamp. This can be very bright and stimulate reflex tear flow. This then changes the apparent fit of a soft contact lens, making it more mobile on the eye. As a result, a poorly fitting, tight lens may be missed. IR photography does not stimulate reflex tearing as it is invisible to the eye. As a result, the lens fit may be more accurately assessed. Additionally, the edges of both soft and RGP contact lenses are much more clearly visualised using IR light than visible (figure 25). This is especially the case with thin edge profile soft contact lenses. Also, IR video photography is excellent for demonstrating fitting problems to patients and students.
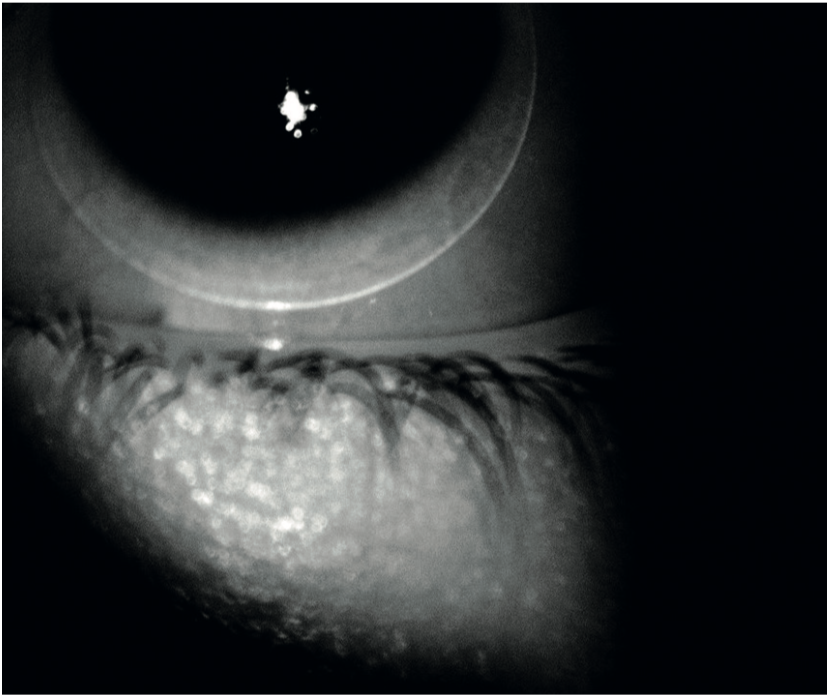
Figure 25: Infra-red photography may better represent the fit and the edge profiel of soft lenses
IR imaging can sometime reveal iris transillumination defects more clearly, than white light with a more physiological degree of pupillary constriction. This is useful in cases of, for example, pigment dispersion syndrome, pseudo-exfoliation syndrome, iridectomy, iridotomy and iris trauma following surgery. The IR image in figure 26 shows iris cleavage that was barely visible with colour photography. Figure 27 show iris atrophy following cataract surgery, again barely visible on colour photography, but clearly apparent with infra-red imaging.
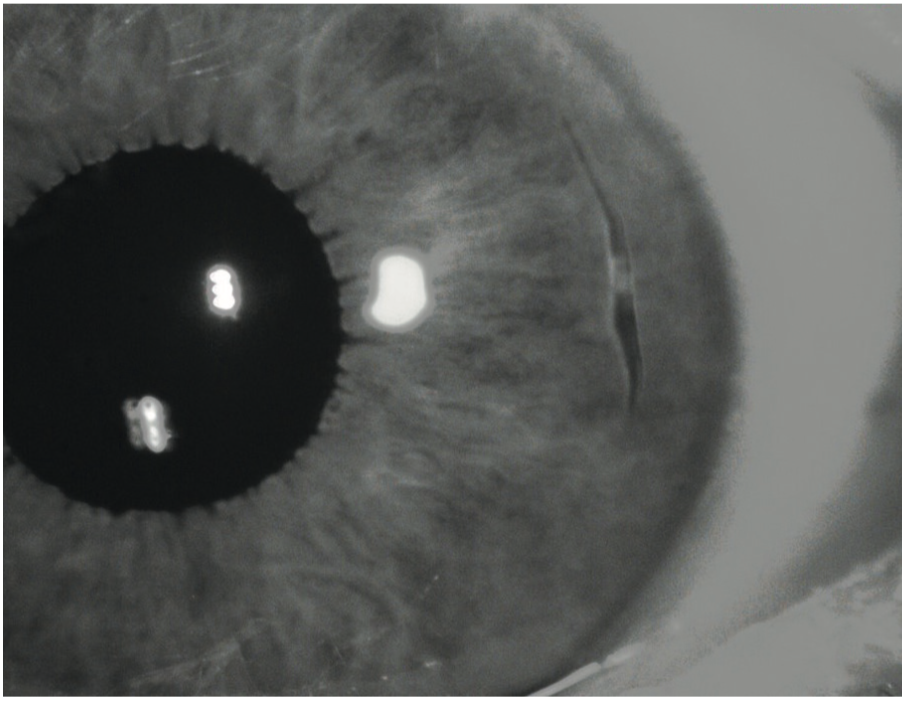
Figure 26: Iris cleavage that was barely visible with colour photography
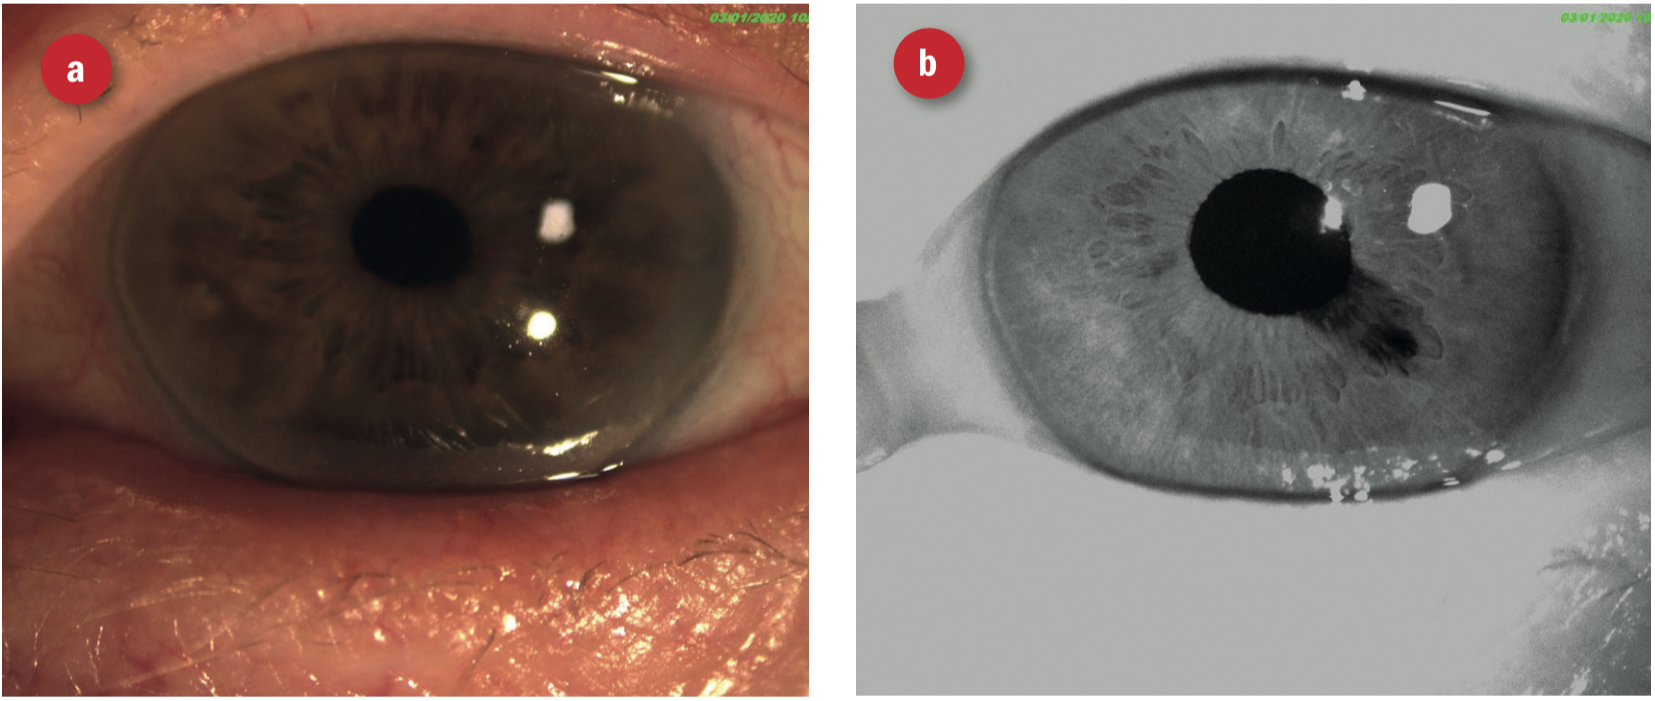
Figure 27: Iris atrophy following cataract surgery (a) barely visible on colour photography, but (b) clearly apparent with infra-red imaging
Conclusion
I hope this article has shown how the choice of incident light has a significant impact over the usefulness of imaging of ocular structures.
Andrew Matheson is a specialist therapeutic optometrist involved in medical retina treatments, glaucoma management and providing hospital laser surgery services.
References
- Lemp, M. A., Crews, L. A., Bron, A. J., Foulks, G. N., & Sullivan, B. D. (2012). Distribution of Aqueous-Deficient and Evaporative Dry Eye in a Clinic-Based Patient Cohort. Cornea, 31(5), 472-478. doi:10.1097/ico.0b013e318225415a
- Nichols KK, Foulks GN, Bron AJ et al. The international workshop on meibomian gland dysfunction: executive summary. Invest Ophthalmol Vis Sci. 2011;52(4):1922-9.