From a simple screw replacement to re-stringing a nylon supra spectacle repairs are a daily occurrence in optical practice, often at the most inconvenient times. To save that inconvenience for the practice increasingly even simple repairs such as shortening sides, replacing nose pads and re-plugging rimless spectacles are sent away, passing the inconvenience to the patient, and often incurring costs to the practice out of all proportion to the task at hand.
Any reader who has ever spent half an hour looking for the correct screw, or trying unsuccessfully to put the correct screw back in a spring hinge, knows that a huge amount of time can be wasted on repairs, usually for no reward since most repairs, at least for the practice’s own patients are rightly conducted free of charge under warranty as part of the service opticians provide.
The most time-consuming repairs do not need to be. With a well-organised repair area, and the correct tools for the job, most repairs can be completed within a few minutes, and some only take seconds, yet some patients are required to wait days, perhaps even weeks, without their glasses, by practices who have not invested in the right tools, consumables or training.
Prevention is better than cure
Far and away the most common repair in practice is the replacement of screws used to attach the sides to most frames, retain the lenses on full rim metal frames and attach the nose pads on many metal, rimless and supra frames. It is easy to suggest that screws coming lose is an occupational hazard, the result of wear and tear and constant use, an acceptable fact of spectacle wearing life, but if we reflect on the use of screws in other sectors we have no expectation that they will work lose, or worse fall out, with potentially devastating consequences. Screws (and nuts and bolts) keep aeroplanes in the air, vehicles on the road, and bridges spanning rivers, so why do theirs not fall out?
The answer is that the aerospace industry takes action to ensure that screws remain secure and opticians should do the same. Side screws can be secured by peening, (see figures 1 and 2) riveting over the end of the screw, so that it mushrooms out and cannot work lose. Well-designed frames should have screws that are pre-dimpled to make this process easier and it is a key feature to look for when buying frames for the practice.
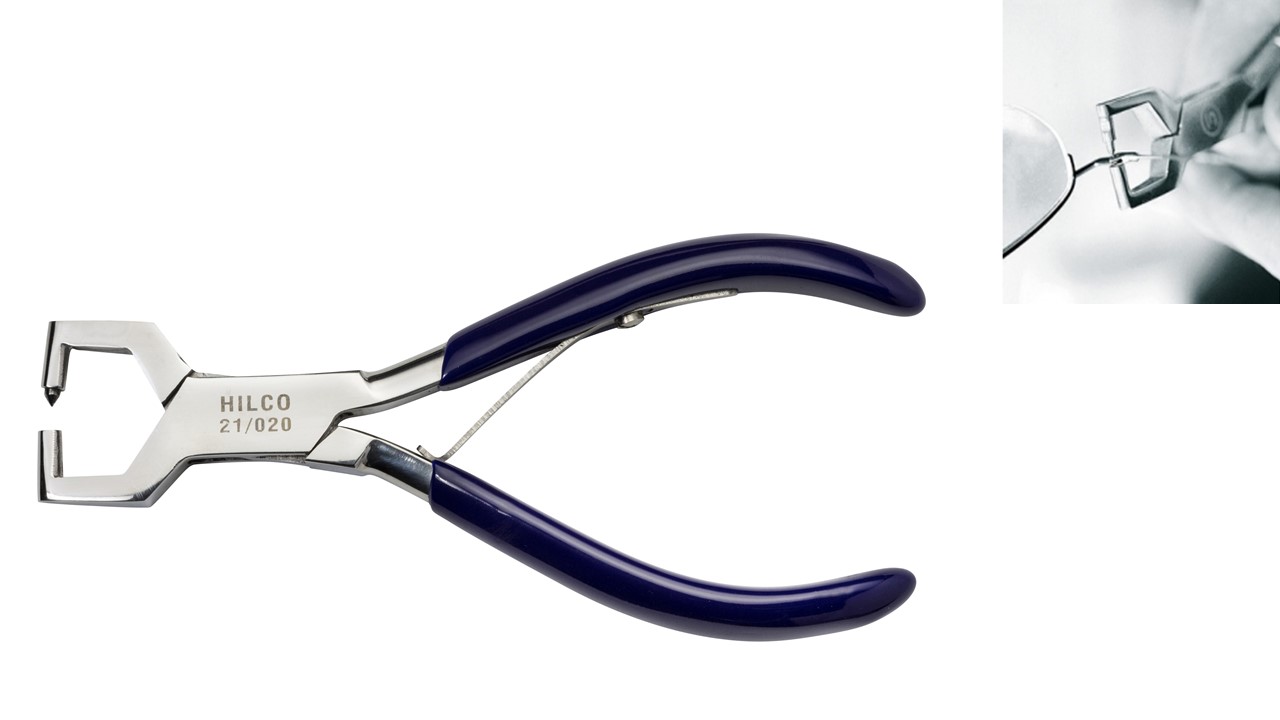
Figure 1: Peening pliers and clavulus. These are used to rivet over side screws so that they don’t work loose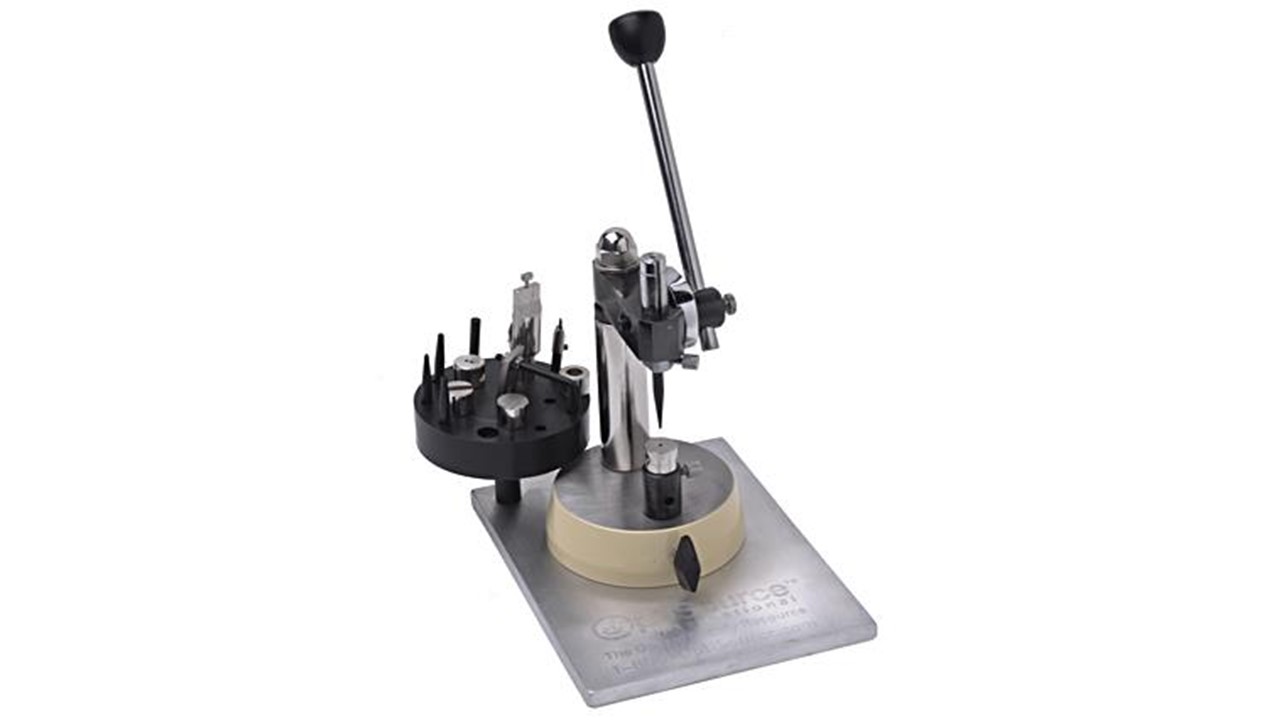
Figure 2: The Clavulus Hand Press
Lens retaining screws can be dipped in thread sealant to ensure that vibration and wear and tear do not cause them to work lose. Alternatively, along with nose pad screws, lens retaining screws can be purchased pre-dipped in thread sealant (figure 3).
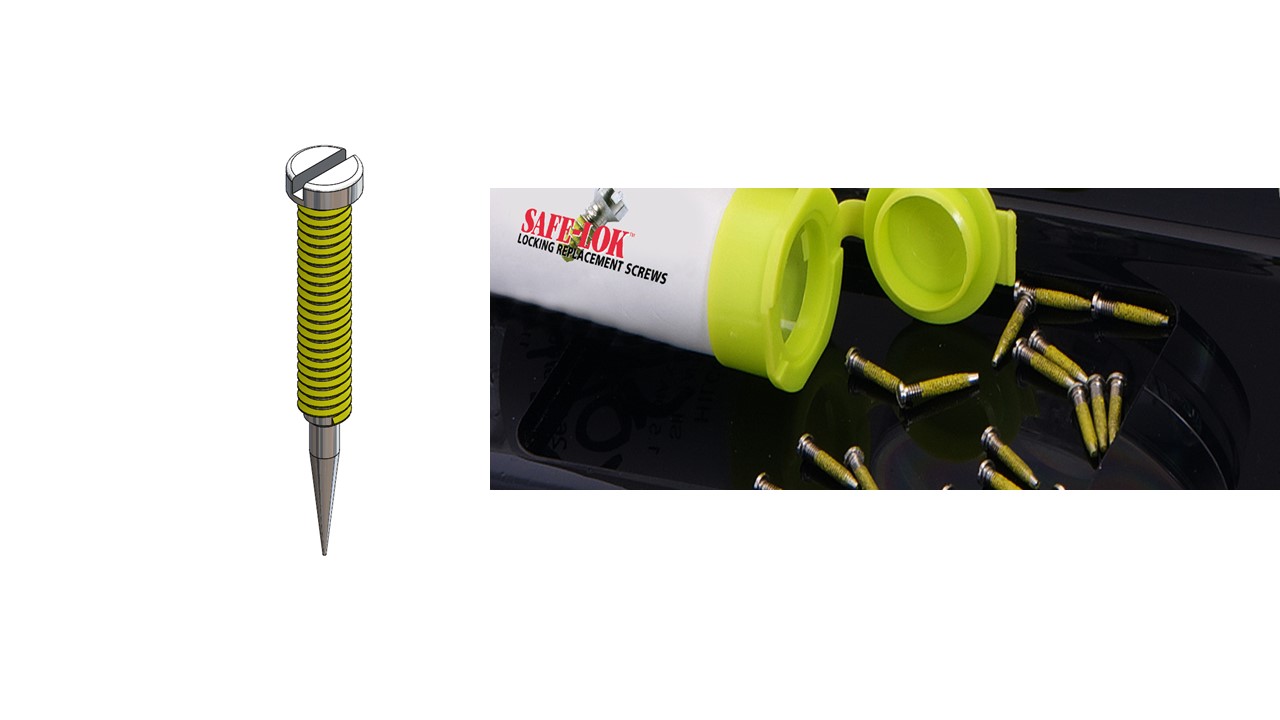
Figure 3: Screws can be purchased that are pre-dipped in thread sealant
It is important to realise that a thread sealant is not a glue. Although it helps the screw to stay in place it does not do so permanently in a way that the screw cannot be removed in the future, as would happen with say superglue. This confusion has perhaps arisen because of the tendency to call thread sealant by a common trade name – Loctite. Loctite manufacture hundreds of adhesives and sealants and it is important to select the correct product to avoid permanent damage to the frame or the surface of the lens (figure 4).

Figure 4: Thread sealants prevent the vibration and wear that cause screws to work loose but do not permanently bond the screw as would happen with, for example, cyanoacrylate adhesives (superglue). Thread lock should be used on all lens retaining screws to prevent them working lose. Nose pads screws are best pre-dipped, as are side screws of they are not suitable for peening
The final preventative measure that practitioners can adopt is to be vigilant when handling patients frames on collection or when they present for adjustment or realignment and check for screws that are at risk of working lose. Even if the hinge feels sufficiently tight always test with a screwdriver to check it cannot be tightened further, and similarly check whether the lens retaining screws and nose pad screws cannot also be tightened a little too.
Tricks of the trade
When a screw does need replacing an awful lot of time can be saved by thinking carefully about the range of screws staff have available to them, and also the tools they can use to select the correct screw, insert it and tighten it.
There are various gadgets available that allow the practitioner to measure the frame to ensure the correct sized screw is selected, and indeed to measure the screw to be sure of its size (figure 5).
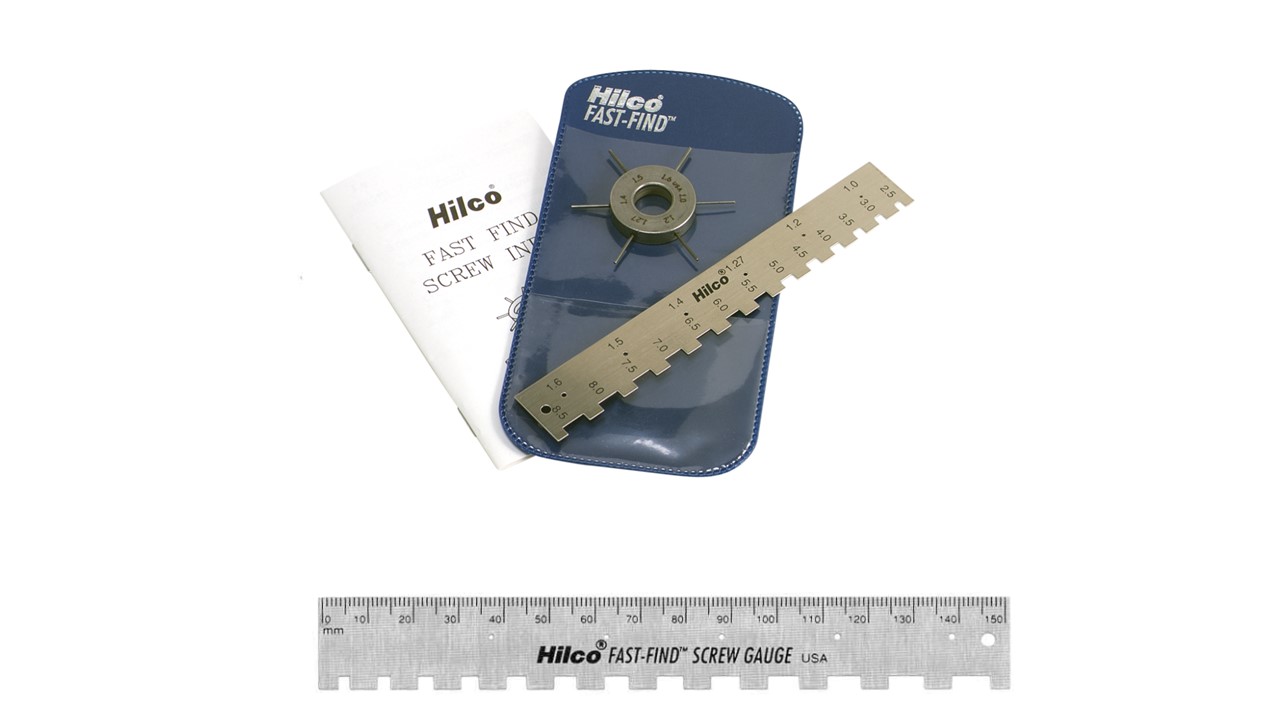
Figure 5: Gadgets to determine the hole size and select the correct diameter and length of screw
Even knowing the correct size of screw required, some practitioners then spend an age trying to find one – usually as a result of being disorganised. Most repair kit suppliers produce screw kits that are clearly labelled by both diameter and length to make this process easy, or make extra-long screws that can be snapped to the correct length after insertion.
Extra-long and pointed screws are also very useful for spring hinges which frequently take a long time to repair as the mechanism needs to be pulled out for the holes to align properly. Several gadgets exist to make this fiddly task much simpler.
Many screws are tiny and picking them up and/or inserting them can be difficult but made easier with spring loaded tweezers or a ‘pick-up’ screwdriver (figure 6) or similar.
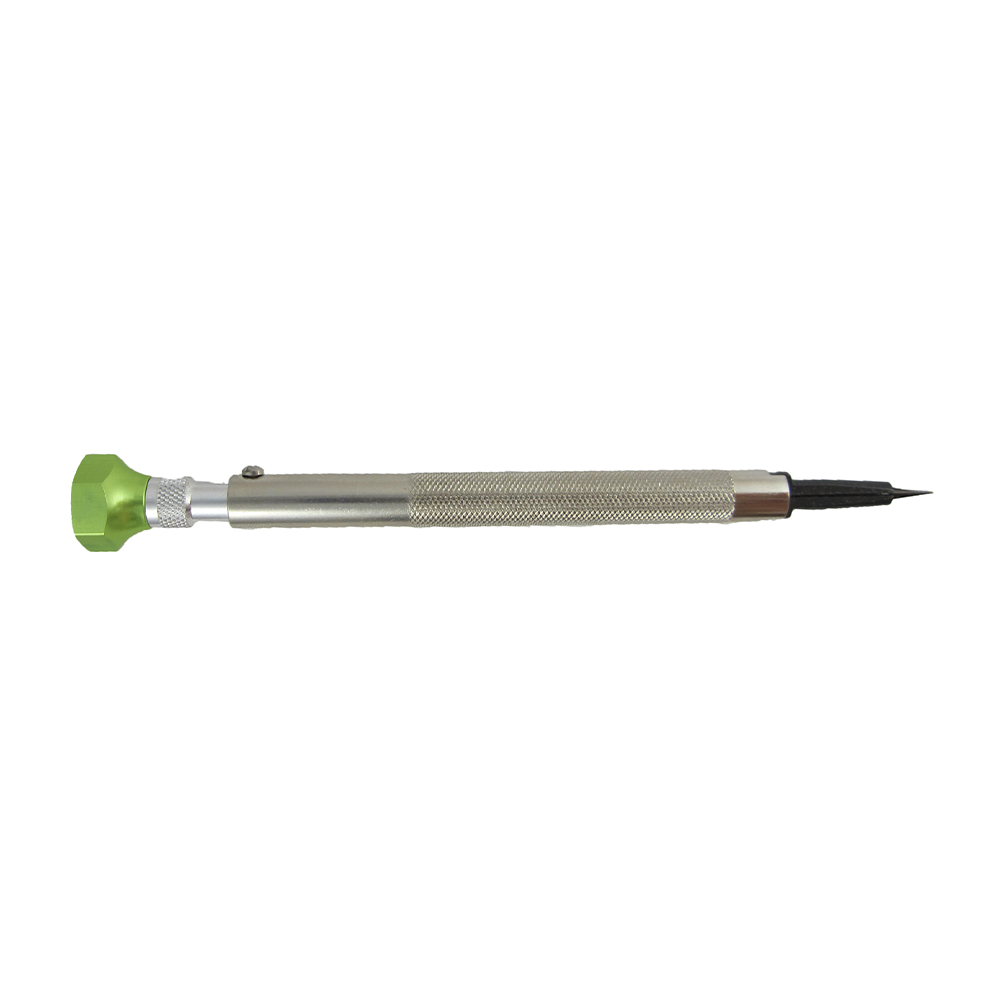
Figure 6: Pick-up screw driver
It is also important to use the correct size screwdriver with a blade width that matches the head of the screw. Too small and it will not tighten the screw sufficiently and will likely twist the blade, too big and it will damage the surrounding metal once the screw becomes flush with the surface.
Health & Safety
In the authors’ experience, screwdriver stick injuries are the most common accident book entry in optical practice, outnumbering all other accidents (trips, slips, falls, etc) combined. Seemingly minor injuries, they should not be taken lightly as they can lead to serious infection – see case study. Injury can easily be prevented by always: resting the frame on a firm surface (figure 7); using the correct sized screwdriver (figure 8); discarding chipped or damaged blades; and taking measures to protect the hands (and lenses) so that if the screwdriver should slip it will be into the desk and not the hand (figure 9).

Figure 7: The Rook Anvil provides a solid cushioned surface to brace the frame when tightening screws. (Available from Dibble Optical and Hilco)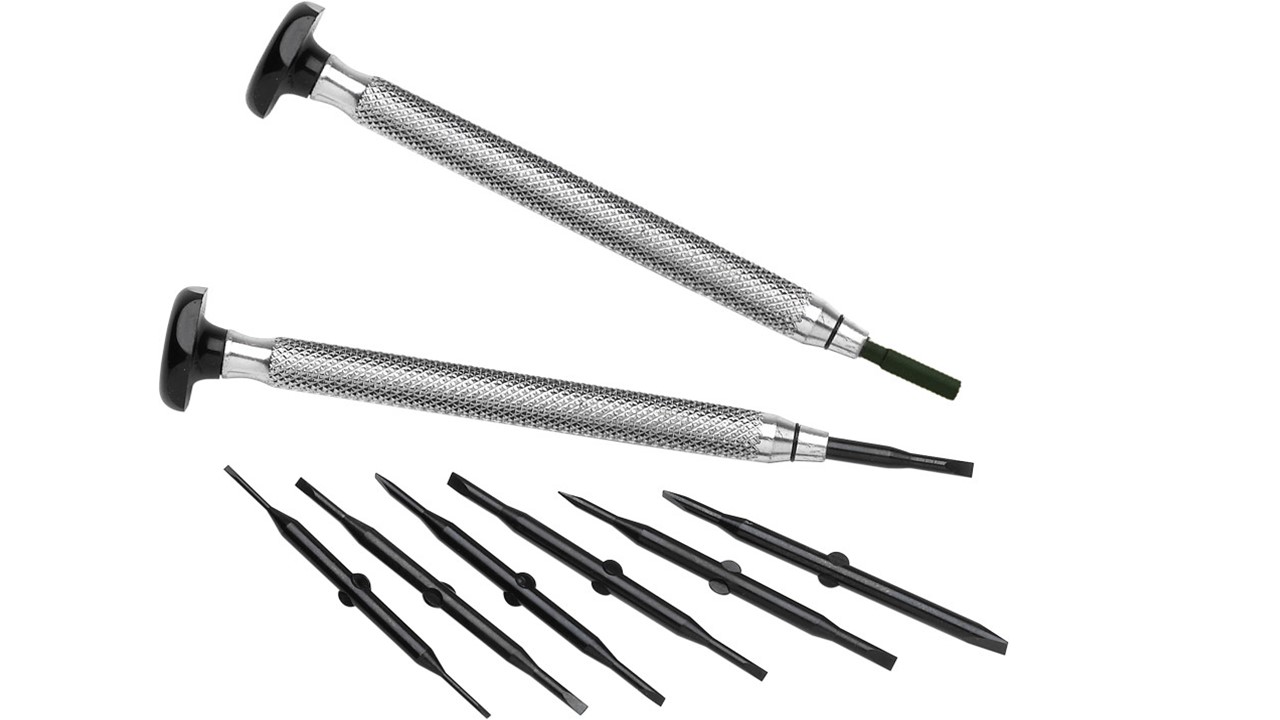
Figure 8: Ensuring the screwdriver blade width matches the diameter of the screw helps to prevent slips, injuries and damage to the frame or lenses
Figure 9: Henry lens protector helps avoid unnecessary damage or injury
Where an injury does occur the risk of infection can be reduced by: Encouraging bleeding by squeezing; washing thoroughly with soap and water; applying a clean waterproof dressing; and ensuring that if screwdrivers are used for removing detritus from patients’ frames they are rinsed afterwards and disinfected using alcohol wipes.

Common in-practice repairs
To avoid patients being without spectacles unnecessarily it is incumbent upon dispensing opticians, optometrists and colleagues who are responsible for repairs to be able to carry them out competently and efficiently. Trainee dispensing opticians also need to be able to carry out the following common repairs in order to be sure of passing their professional qualifying examinations:
- Re-stringing a nylon supra
- Re-plugging a plugged rimless
- Shortening a metal side
- Shaping a rim to fit a curved lens
- Springing in lenses
- Increasing angle of let-back using a file
Restringing nylon supra
Replacing a cord in a supra mount should be a two-minute repair, yet frequently can take much longer, and is often done so poorly that it has to be done again to ensure that the lens is held securely without any rotation.
The first step is to remove the two parts of the broken cord – a variety of pins, needles and craft knife blades are useful to this end. A piece of nylon of the correct diameter needs to be selected and secured at one end then passed round the lens groove and through the hole to the other side of the lens. Before being secured the nylon should be marked so that it can be positioned so that cord in contact with the lens is reduced in length by approximately 3mm. This means that once secured and passed round the lens it will hold the lens tightly.
Supra repairs often fail quickly if they are done incorrectly. It is important not to create undue friction in the nylon cord as the heat can damage the nylon and, as any fisherman will testify, dramatically reduce its breaking strain. To reduce the chance of breakage:
- Always use ribbon or a metal supra thread hook (figure 10) and not another piece of nylon
- Pass the cord over the front of the lens rather than the back as the edge is less sharp
- Work from the temporal edge to the nasal so that the tightest corner is not negotiated last when the strain on the cord will be at its greatest
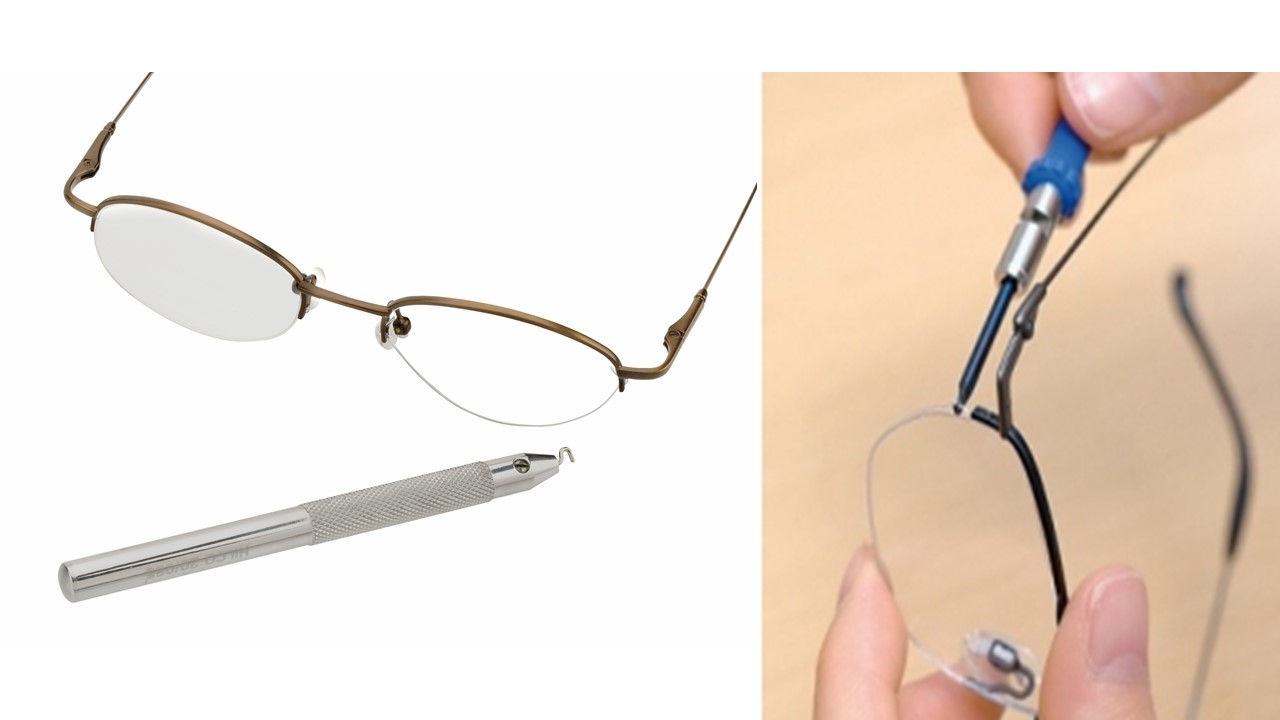
Figure 10: Supra thread hook (courtesy of Dibble Optical)
Supra cord varies, but is most often 0.5mm in diameter and is best purchased in small straight lengths from optical wholesalers. Nylon monofilament fishing line makes a good substitute – 0.5mm is equivalent to approximately 12.5kg breaking strain – however, care needs to be taken to cut the line cleanly without squashing it (using very sharp scissors or a craft knife rather than side cutters for example) otherwise it will be impossible to insert into the tiny holes in the rim.
Re-plugging plugged rimless
There are few tasks in optics where having the right tools for the job can make such a dramatic difference to the optician’s ability to carry it out quickly and without unnecessary damage to the frame or lenses than re-plugging a rimless mount. Where a plug has worked lose but not separated the first thing to try is compressing the plug to see if it will tighten without the need to replace it. If it does need replacing, then the first step is to cut away the plastic plug using snips designed for this purpose. Please note that these snips are designed only for cutting plastic and should not be used to shorten sides or snap screws as they will immediately be damaged and rendered useless for plug removal as their many rough edges will scratch the lens.
Once the plug head has been removed it is necessary to gently snip the remains of the plug from the spindles of the mount. Next a plug of the correct size is inserted into the lens (usually from the rear) and cut flush with the opposite lens surface (usually the front) to the correct length – snips, a craft knife or a special guillotine tool similar to a cigar cutter being ideal for this purpose. At this stage check that the plugs have not been closed over by the cutting process and if necessary open them up using a map pin or similar.
Pressing the head of the plug against the lens (using a dummy lens or similar to get adequate force) insert the mount pins into the plug and, ensuring the head of the plug stays flush, squeeze the plug with compression pliers to securely attach the side/bridge. Take care not to trap the lens in the jaw of the pliers by approaching the plug from the nearest edge (usually the top) to avoid scratching or cracking it.
To avoid lose plugs it is vital that the correct sized plug is used, ideally the one supplied by the manufacturer, that is recommended for the mount (figure 11). For example, plugged rimless mounts were pioneered by Silhouette at around the turn of the millennium, and their plugs utilise a 1.4mm external diameter and an internal aperture appropriate to the pins on their mounts. Other brands use 1.5, 1.6 or larger plugs. Occasionally a lab may forget to change the drill bit and drill 1.6mm holes (the second most popular plugs) for a mount that requires 1.4mm plugs. To save wasting the lenses it is possible to procure plugs with an external 1.6mm diameter but with the same internal diameter as a 1.4mm plug. Other specialist plugs include extra-long ones (to accept high minus lenses up to about -17.00 DS in the authors’ experience), short ones (for speeding up the refitting of thin/dummy lenses) and different coloured plugs for different effects.
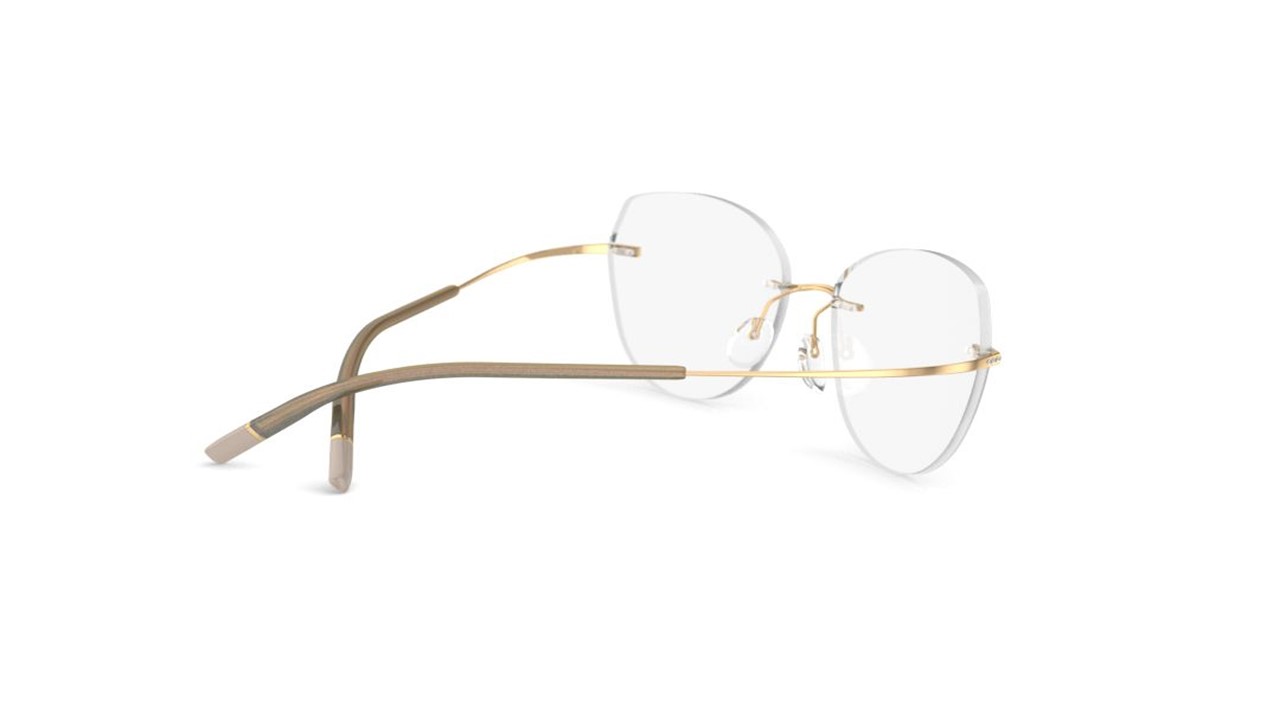
Figure 11: Silhouette pioneered the concept of plugged rimless and produce different plugs depending on the style of the frame. Rigid hinged styles require a different type of plug to the flexible hingeless styles such as the Titan Minimal Art – The Icon pictured. These spectacles are very robust and will take years of wear and abuse but only if an appropriate break resistant lens material and the correct plugs are used
Practitioners who regularly re-plug rimless mounts will recognise the value of investing in good quality compression pliers with a series of interchangeable jaws which can accommodate plugs that are vertically oriented or offset because of the lens profile (figure 12).

Figure 12: Good quality compression pliers come with a variety of interchangeable jaws to adapt to differently oriented plugs
Traditional nut and bolt rimless
Disassembling and reassembling traditional screwed rimless mounts is largely common sense, however, it can be difficult to remove the hardware from the lens and removal pliers are useful to avoid damaging the lens or bending the screws. Nut drivers are used to tighten the nuts of various shapes (star, hexagon) and sizes. Nut drivers are often used for inappropriate purposes such as breaking tap-n-snap screws and are frequently damaged – the one the practitioner needs often being the one that is missing from the set. A spring-loaded universal locknut wrench is a great replacement (figure 13).
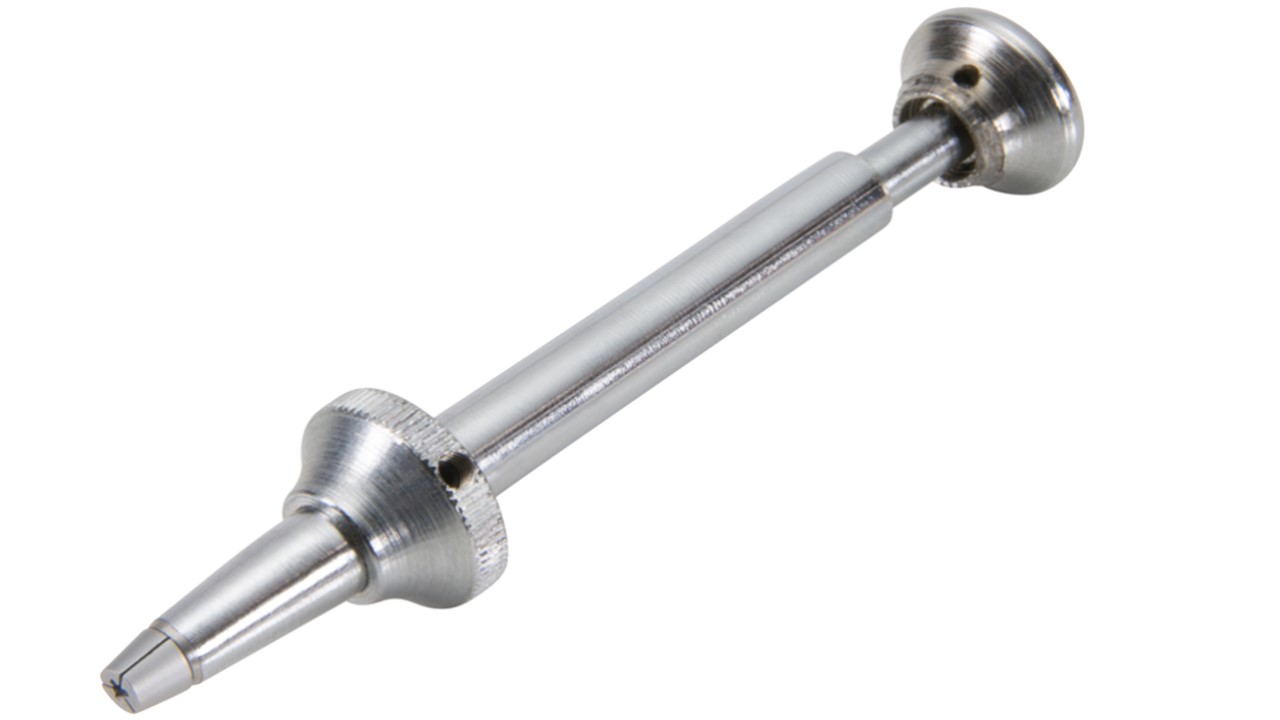
Figure 13: Universal nut driver can be used on all hexagonal and star shaped nuts and bolts
Shortening a metal side
A glance at the spectacles worn by the UK public shows that this particular repair/adjustment does not happen nearly often enough. Ignoring those frames with plastic sides that are tricky or impossible to shorten most metal sides with plastic tips can easily be shortened as can most curl sides too. In exams students often struggle to work out the amount to cut off the side once the tip has been removed. Instead, it is easier to measure or estimate how much the length to bend or total side length needs to be shortened by (figure 14). 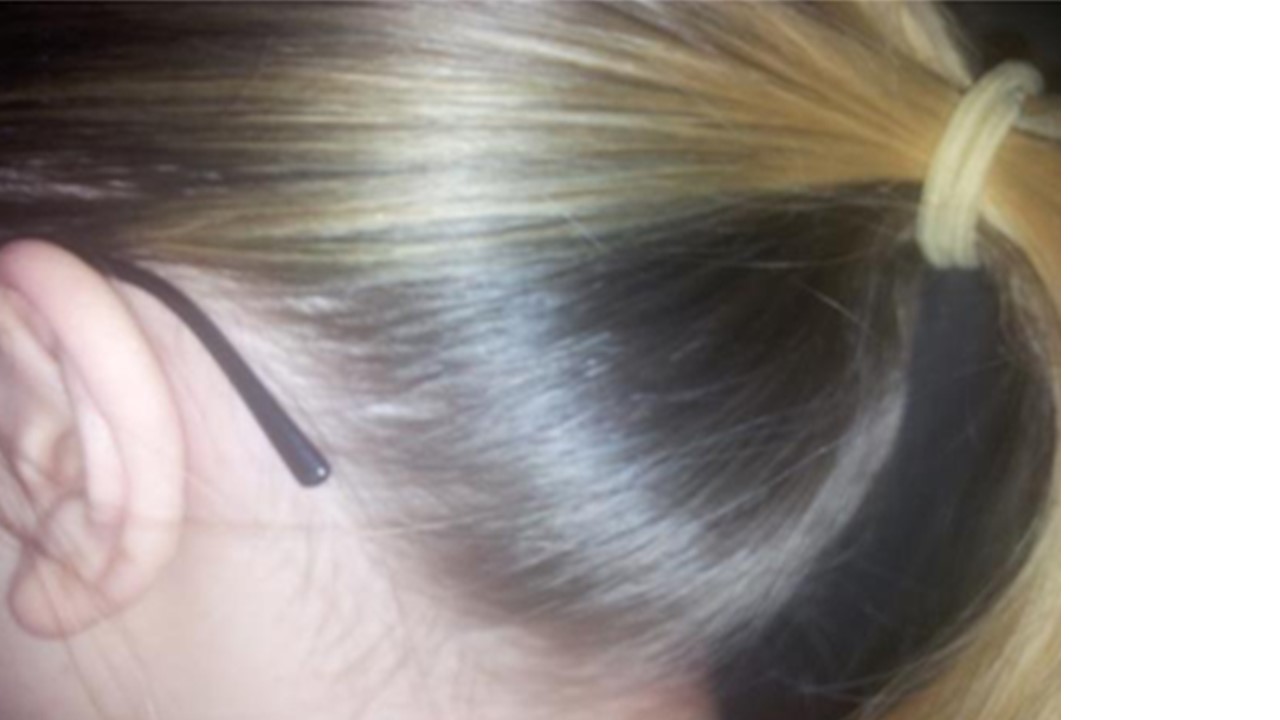
Figure 14: By looking behind the ears it is easy to measure or estimate by how much a side needs to be shortened
Once the amount the side needs to be shortened by has been determined the tip should be gently heated before the side is straightened and the tip removed. It is important not to overheat the tip as this may cause the tip to twist and be damaged in the process or can cause the tip to shrink and make it difficult or even impossible to remove without cutting it off. Depending on the material it may be best to straighten the side without using heat at all.
Rather than measure and mark the position where the side needs cutting time can be saved by knowing the depth of the side cutters to strategic positions on the hinge or jaws, thereby ensuring both sides are reduced my identical amounts without the need to measure or mark them (figure 15). After the side has been cut it is essential to smooth the tip using a file to avoid scratching the inside of the tip when it is put back on, as sharp edges can cause the tip to snag so that it will not go back on and on clear tips can produce unsightly scratch marks along the length.

Figure 15: Carbide jaw end cutters are suitable for trimming the toughest side materials including titanium up to 1.6mm as well as stainless steel and nickel alloys. To ensure equal amounts are removed from each side without measurement place the end of the side to the base of the jaw, or to the same position on the side of the hinge
Shaping a rim to fit a curved lens
Linking 3D frame scanners to state of the art glazing machines means a bevel can often be cut that matches the eyewire exactly. Nevertheless, high plus lenses, especially if edged on traditional equipment, often require that the frame rim is reshaped to match the lens rather than the other way round. Rim forming pliers (figure 16) are most useful for carrying out this repair, but other tools such as a bionic thumb, side bending pliers (figure 17), and jewellery pliers are sometimes more useful depending on the design of the frame.
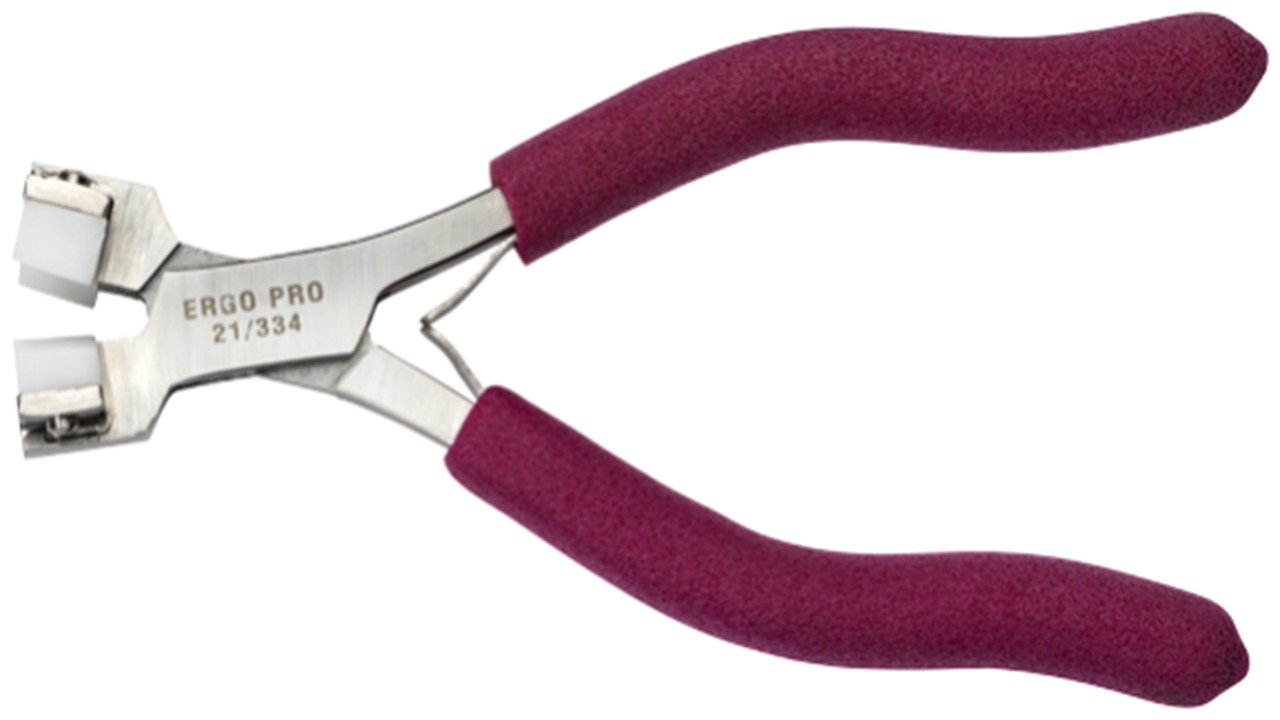
Figure 16: Rim forming pliers

Figure 17: 3 roller bending pliers have a variety of uses including rim forming and make a good addition to any toolset
Springing in lenses
To spring in lenses competently the practitioner must first identify the material the frame is made of to ascertain whether it needs to be heated, and if so to what temperature, before the lenses may be inserted.
Many plastic frames, especially those of polyamide type materials such as Silhouette SPX, Stepper TX5 and TR90 are cold glazed. Care still needs to be taken not to twist or buckle the rim and to ensure the lens has not been cut too large. The sharpest corner of the lens should be inserted first, (the upper nasal corner usually) working round the lens feeding the lens into the groove, and finishing with the part of the lens that is least curved to facilitate insertion with the least effort and the lowest likelihood of damaging or breaking the frame (figure 18).
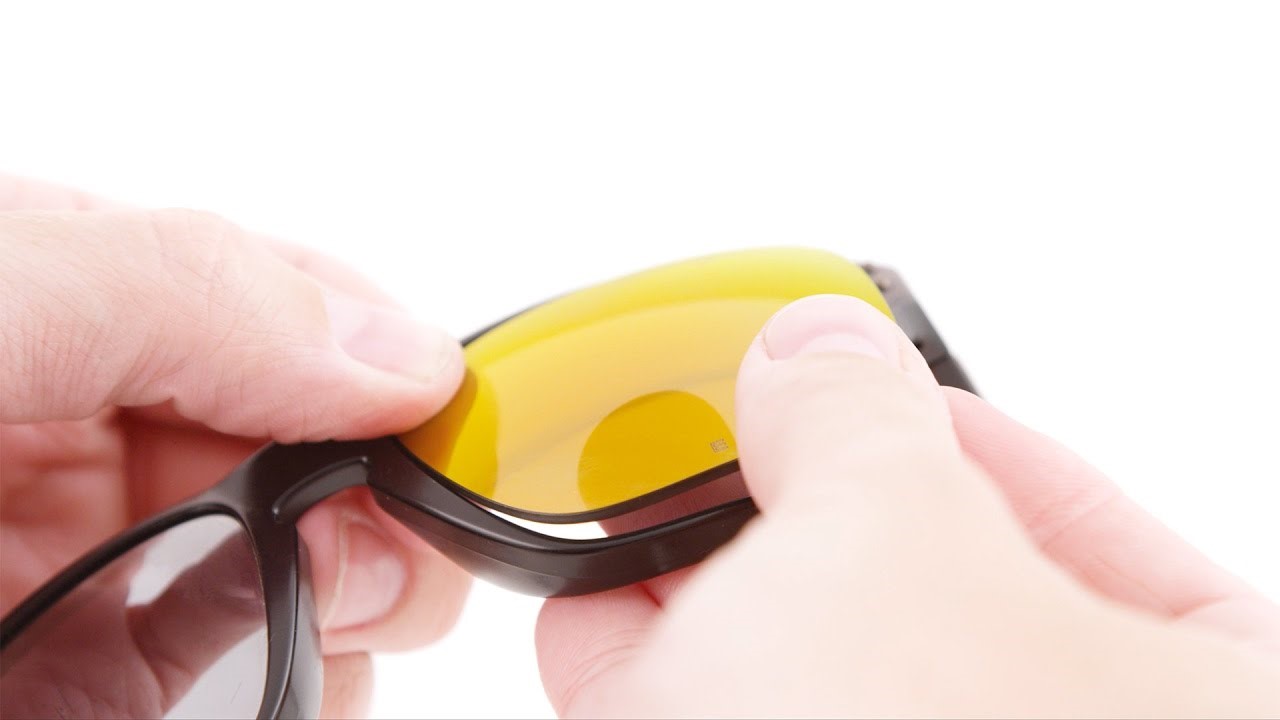
Figure 18: Inserting lenses into a plastic frame, start with the most angular part of the lens (usually upper nasal corner) working round the lens feeding it into the groove and finally springing in the lens at the least curved corner, most often the lower nasal part
Although the process is essentially the same as for cold glaze frames other plastics such as cellulose acetate and Optyl require heating to varying degrees before springing the lenses in. Using a frame heater, the front is heated evenly over the front and it is important to keep the frame moving to avoid over-heating in one area. There is no set rule as to whether lenses should be inserted from the back or the front, some prefer to spring-in from the back to avoid damaging the front where any slight damage would be visible, however, it is most often easiest to insert the lenses from the front.
Steady consistent pressure needs to be applied to feed the lens into the groove until the lens again snaps into place. Too much pressure or heat, or too large a lens, and it is likely that the rim will be ‘rolled’ or twisted. Mastery of this task is achieved by practising on old obsolete spectacles as it is an essential skill for every optometrist and dispensing optician.
Prior to undertaking springing-in the curvature of the front needs to be compared to the curve of the lens as these need to be consistent and adjusted accordingly if a secure fit is to be achieved. Lastly on completion of the task the prescription needs to be verified using a focimeter to check that the axis is accurate, this is especially important on frames with round lens shapes which have a habit of being used in professional qualifying examinations.
Increasing angle of let-back using a file
Increasing the angle of let back (that is increasing the temple width/head width), or indeed changing the pantoscopic angle on frames with very thick sides, can often only be achieved by filing away material from the side or front. In an exam situation, as with a real patient’s frame, care needs to be taken to ensure the file remains level as it is used to avoid curving the butt end of the side. Always select a file with a safety edge to avoid unnecessary scratches from the edge of the file and protect the side from damage should the file slip. This was covered in some detail in the previous instalment on adjustments.
Conclusion
Conversations with frame suppliers and frame repair workshops reveal that many practices seem unable to carry out even the simplest of repairs, preferring instead to send the patient’s spectacles away.
One titanium frame supplier reported receiving hundreds of frames back every month to have the sides shortened, despite charging £25 for the service, and despite their well-designed frames being constructed with easily removed tips with sight shortening in mind. Practices are seemingly unaware that investing in specialist carbide tipped side cutters, as mentioned above, are all that is required to complete this five-minute task.
Similarly plugged rimless manufacturers report a never-ending stream of frames being returned for repairs that could be completed in five or 10 minutes in practice.
In each case the patient is without their spectacles for several days, perhaps longer, no doubt often at great inconvenience. The General Optical Council, via its Standards of Practice for Optometrists and Dispensing Opticians, instructs that registrants make patients their overriding concern, and would no doubt be disappointed that registrants are rendering some of their patients unnecessarily visually impaired, albeit temporarily, by making them wait days for repairs that could easily be carried out in
minutes.
The duty of care that is placed upon opticians to help their patients see as clearly as possible is never more pressing than when a patient will be rendered temporarily disabled through breaking their glasses, or their spectacles falling apart because a screw worked lose. Most opticians have gone the extra mile to help a patient who cannot see to work or legally drive because they have broken their glasses and do not have a spare pair – springing the lenses into a new frame, even drilling and stitching the bridge or rim of an acetate frame as simple temporary solutions. That same duty of care should extend to ensuring the facilities and tools are available for practices to conduct all routine repairs on the premises to minimise inconvenience to the patient.
Peter Black MBA FBDO FEAOO is senior lecturer in ophthalmic dispensing at the University of Central Lancashire, Preston, and is a practical examiner, practice assessor, exam script marker, and past president of the Association of British Dispensing Opticians.
Tina Arbon Black BSc (Hons) FBDO CL is director of accredited CET provider Orbita Black Limited, an ABDO practical examiner, practice assessor and exam script marker, and a distance learning tutor for ABDO College.